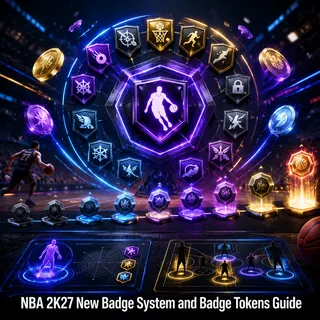
NBA 2K27 New Badge System and Badge Tokens Guide
NBA 2K27 completely changes the way badges work. With 53 total badges, including 19 brand-new additions, building a MyPLAYER is no longer just about pushing attributes as high as possible. Badge selection and Badge Token management can have just as much impact on how your player performs.
The biggest change is that Badge Tokens give you more control over your progression. Instead of automatically treating every badge upgrade as equally valuable, you need to decide which badges actually fit your playstyle and which ones are worth spending Tokens on.
How the New Badge System Works
The new system gives players more flexibility when customizing their MyPLAYER. The 53-badge pool covers scoring, shooting, playmaking, defense, and other parts of the game, while the new badges add more ways to specialize.
That doesn’t mean you should try to equip everything.
Most builds will get better results by focusing on a small group of badges that directly support their role. A point guard who spends most possessions creating off the dribble needs a very different setup from a center who lives around the paint.
The goal is synergy, not simply collecting the highest badge levels.
Badge Tokens Are a Limited Resource
Badge Tokens should be treated like a valuable currency.
Before spending one, check how much the upgrade actually changes your player. If a Token only provides a minor improvement to a badge you rarely activate, save it for something more useful.
For example, a ball handler may get more value from upgrading a key playmaking badge than putting the same Token into a finishing badge that only activates occasionally.
This is especially important early in the year, when your build is still developing and you have fewer resources available.
Understanding Badge Costs
Badge costs can vary depending on the badge and the level you’re trying to reach. Attribute ratings and your player’s position can also affect which badge levels are available.
Instead of trying to max every badge immediately, start with the badges that define your role.
A shooting guard might prioritize shooting and perimeter defense. A primary point guard should generally invest heavily in playmaking and shooting. Inside bigs can focus on finishing, rebounding, and defense.
This approach makes every Token work harder.
Rebirth and Token Unlocks
Rebirth becomes particularly important once you start creating additional builds.
The different Rebirth progression levels can provide access to additional Badge Tokens, giving experienced players more flexibility when developing future MyPLAYERs. The exact Token benefits depend on the progression level you’re working toward, so it is worth checking your current Rebirth requirements before committing to a new build.
The main advantage is efficiency.
Instead of starting every new build completely from scratch, Rebirth progression can reduce the amount of grinding required to get important badges into a usable range.
Build Badge Combinations, Not Individual Badges
One of the biggest mistakes players make is looking at badges individually.
A good badge combination should improve the way your build actually plays.
For example, a guard who relies on pick-and-rolls can combine ball-handling and passing-focused badges with shooting badges that punish defenders for going under screens. A slashing guard can instead combine finishing badges with speed and creation tools that help get downhill.
Defenders should think the same way. A strong perimeter setup becomes much more useful when multiple defensive badges support staying in front of the ball handler rather than relying on steals alone.
This is where the new system can make builds feel much more personal.
Badge Tokens in REC and Pro-Am
Badge efficiency becomes even more important in REC and Pro-Am.
Against organized teams, opponents will quickly identify your weaknesses. If all your Tokens are invested into scoring while your defensive badges are neglected, teams can simply attack you on the other end.
A balanced badge setup gives you more ways to stay involved.
If you’re already managing NBA 2K27 MT for your MyTEAM roster, remember that MT and Badge Tokens serve completely different purposes. Don’t sacrifice MyPLAYER progression decisions just because you’re also building a competitive MyTEAM lineup.
The Most Efficient Strategy
A simple approach works well:
First, identify the three or four badges that define your build.
Second, upgrade those badges before spending Tokens on secondary options.
Third, look for badge combinations that work together instead of isolated upgrades.
Finally, save some Tokens for later progression rather than spending everything immediately.
This becomes especially useful after Rebirth, when you’re developing multiple builds and want each one to have a clear identity.
If you’re also looking into NBA 2K27 MT for sale, keep your MyTEAM spending separate from yourMyPLAYER decisions. MT can improve your card collection, but smart badge management is what makes your MyPLAYER perform better.
The new 53-badge system gives NBA 2K27 players more freedom, but it also makes poor resource management more expensive.
Don’t chase every badge just because it is available. Build around your position, playstyle, and most-used animations. Spend Badge Tokens on thresholds that actually affect your gameplay, and use Rebirth progression to make future builds more efficient.
The best badge setup isn’t the one with the most upgrades. It’s the one where every badge has a reason to be there.