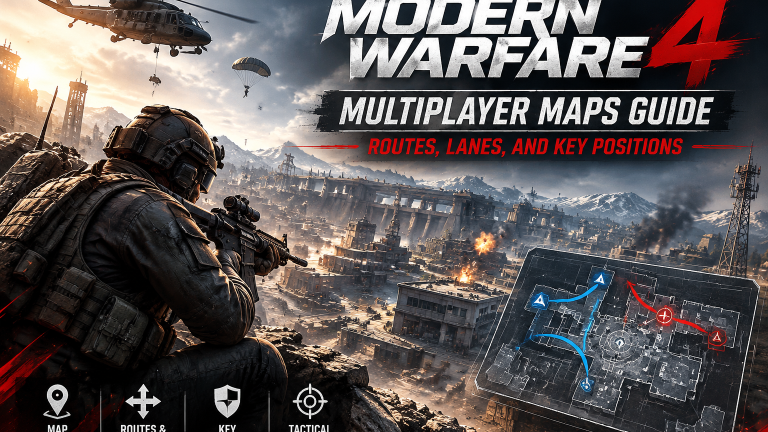
Modern Warfare 4 Multiplayer Maps Guide: Routes, Lanes, and Key Positions
Winning gunfights in Call of Duty: Modern Warfare 4 is not just about reaction speed or choosing the right weapon. Understanding how a map connects its combat areas can help you approach objectives more safely, recognize dangerous sightlines, and avoid repeating predictable movements. The best players learn not only where enemies might appear, but also how to reposition when a route becomes unsafe.
MW4’s launch multiplayer lineup includes 12 Core 6v6 maps, three 32v32 Ground War maps, four 2v2 Gunfight maps, and Kill Block, a modular arena supporting 3v3 and 10v10 Gunfight. Shipment is a post-launch addition scheduled for October 27, 2026. Each map category requires a different approach: Core maps emphasize local positioning, Ground War demands wider battlefield awareness, and Gunfight rewards careful decisions in small-team engagements.
This guide covers the officially described environments, explains how to evaluate routes and key positions, and provides practical advice for adapting to different multiplayer modes. Specific tactical recommendations are based on the published map features; always verify exact pathways, cover, and sightlines in the in-game Tac-Map or during a match.
1. Understand Routes, Lanes, and Key Positions
Before learning individual maps, understand the three elements that shape most multiplayer engagements.
| Map Element | What It Means | How to Use It |
| Main route | A commonly used path between major areas or objectives | Use it when you need a direct approach, but check for enemy coverage first. |
| Alternative route | Another available way to reach an area | Use it to change your approach when enemies repeatedly hold the same angle. |
| Combat lane | A path or open area where players can engage across a particular line of sight | Avoid crossing without checking likely enemy positions and available cover. |
| Key position | A location that offers useful visibility, cover, or access to an objective | Hold it only while it remains useful; reposition when enemies can attack from multiple directions. |
| Choke point | A narrow or restricted passage that concentrates movement | Coordinate with teammates before pushing through a defended entrance. |
| Flanking route | A route that approaches opponents from a different direction | Use it to disrupt an established defense, but avoid leaving your team without support. |
A route is not automatically good because it is short. The better option is the one that gives you a reasonable chance of reaching your destination without exposing you to unnecessary crossfire.
A Simple Route-Selection Checklist
Before moving into a contested area, ask yourself:
- Where am I trying to go? Identify the objective or position you need to reach.
- What can an enemy see? Check nearby openings, exposed ground, and elevated positions.
- What cover is available? Identify objects or structures that can break line of sight.
- Can my teammates support me? A coordinated push is generally more reliable than entering a defended area alone.
- What is my next move? Decide where you will go if the current position becomes unsafe.
These questions turn map knowledge into a repeatable decision-making process instead of relying on memorized routes alone.
2. Core 6v6 Maps: Key Features and Practical Tactics
The Core 6v6 lineup contains 12 launch maps. Their environments offer different visual landmarks and combat situations, but the official descriptions do not establish one universally best route or position for every mode. Use the following table to identify what to study when entering each map.
| Map | Officially Described Environment | What to Focus On |
| Cachette | French rail-terminal outskirts, an abandoned wine warehouse, and a derelict mechanic’s garage | Learn how the warehouse and garage connect to nearby combat areas. Check entrances before committing to an interior fight. |
| Coal | The same French rail-terminal setting described for Cachette | Learn the actual layout separately in the Tac-Map rather than assuming its routes are identical to Cachette. |
| Lithium | A lithium-processing refinery in rural Mexico beneath the Sierra Mountains | Identify the routes between industrial structures and exposed areas. Check visibility before crossing open approaches. |
| Lotus | A South Korean fishing village featuring a market, hostel, boathouse, gardens, and residential blocks | Use the named landmarks to orient yourself, and learn which available approaches connect them to objectives. |
| Mumbai | A dense residential district centered on a Victorian market, with a rail line through residential blocks | Watch how the rail line and surrounding buildings affect movement. Avoid assuming an apparently clear approach is safe from nearby angles. |
| Munition | A military command facility featuring a depot, monitoring rooms, skybridge, crane, water tower, and hangars | Learn the relationship between major structures and combat areas. Do not treat a prominent landmark as safe without checking its approaches. |
| Nautical | A damaged South Korean ferry with debris and fires across its decks | Pay attention to close-range visibility and nearby cover. Clear unfamiliar spaces carefully rather than rushing blindly into them. |
| Reactor U92 | A damaged South Korean reactor complex with a large command room and containment pool | Learn how the central facility connects to surrounding spaces, and check whether the main approach is being watched. |
| Rooftops | Snow-covered New York hotel rooftops featuring a greenhouse, HVAC platforms, boiler room, patio, skylights, pigeon coop, and laundry room | Study elevation changes and exposed rooftop areas. Reposition when an elevated location makes you easy to spot. |
| Sentry | A snow-covered Russian military base with a command center, damaged barracks, maintenance garage, generator room, and substation | Memorize the major structures and learn the routes between them before committing to repeated pushes. |
| Silkworm | A South Korean shopping district with perimeter apartment access, alleys, a convenience store, gaming den, and subway entrance | Check nearby entrances and alley approaches. Avoid concentrating your attention on a single doorway. |
| Transit 213 | An overgrown parking lot filled with abandoned buses, surrounded by a repair shop, gas station, construction areas, and high-rise residential blocks | Learn which objects actually block sightlines and identify safer ways to cross exposed sections. |
How to Read a New Core Map
When a map loads for the first time, do not try to memorize every corner immediately. Start with a few recognizable landmarks, then learn the connections between them.
First pass: Identify major structures, objective markers, and the most obvious open areas.
Second pass: Follow the routes available to you and note where you can break line of sight. Pay attention to entrances, changes in elevation, and areas where opponents can approach from more than one direction.
Third pass: Compare your route choices with the results of your engagements. If you repeatedly encounter enemies watching the same approach, check the Tac-Map for an alternative rather than automatically repeating the push.
This method helps you build reliable knowledge without relying on unverified claims about specific head-glitches, hidden passages, or guaranteed power positions.
3. Ground War Maps: Think Beyond a Single Lane
Ground War supports 32v32 combat, so map awareness extends beyond the next corner. Roads, terrain, vehicles, structures, and objectives can all influence how your squad moves through the battlefield.
Imjin Farmland
Confirmed features: Open fields, waterways, scattered farms, a large mill, roads, and rail lines.
The official description highlights long sightlines, vehicle maneuvering, and coordinated assaults on strongholds. That makes exposure management particularly important.
Practical approach:
- Check the terrain before crossing an open field.
- Use available structures and terrain to break line of sight.
- Coordinate with teammates when approaching a defended stronghold.
- Pay attention to vehicles and alternative approaches instead of focusing exclusively on distant enemies.
Wolves Stadium
Confirmed features: A dense urban environment centered on a stadium, with multistory buildings, transit lines, tunnels, rooftops, and surrounding hillsides.
The combination of urban structures and different elevations means that the nearest route may not be the safest.
Practical approach:
- Check nearby buildings and elevated areas before crossing exposed streets.
- Use the Tac-Map to understand how tunnels and transit areas connect to your objective.
- Avoid splitting from your squad without a clear reason.
- Reassess your approach when enemies repeatedly defend the same route.
Forest
Confirmed features: A wooded hillside, streets, off-road paths, southern train tracks, a guard tower, a gas station, and barracks.
The official map description identifies the guard tower, gas station, and barracks as important landmarks around the battlefield.
Practical approach:
- Use landmarks to maintain your orientation while moving through wooded terrain.
- Check the visibility of roads and off-road paths before choosing a crossing.
- Be aware that tree cover does not necessarily protect you from every angle.
- Coordinate with your squad before attacking a defended objective.
Ground War rule: Do not judge a position only by how many enemies you can see. Consider whether you can move away from it safely, whether teammates can support you, and whether holding it helps your team contest an objective.
4. Gunfight Maps: Win Through Information and Positioning
Gunfight’s 2v2 format places greater emphasis on individual decisions and teamwork. With fewer players in each engagement, unnecessary exposure can quickly leave your teammate at a disadvantage.
The four launch maps are Cafe, Library, NYC, and Smuggler.
| Map | Confirmed Features | Tactical Priority |
| Cafe | Parisian courtyard, theater, magazine kiosk, central fountain, and an elevated statue | Account for the fountain’s effect on central visibility. Evaluate the statue position against the longer sightlines and sparse cover around the perimeter. |
| Library | Compact state library with bookshelves and a central walkway accessible by stairs | Check the center for rushing opponents and remember that bookshelves can conceal movement. Reassess your angle when moving between levels. |
| NYC | Winter city setting with a central stage, stands, equipment, vendors, and scattered vantage points | Use ground-level objects for movement and cover, while checking elevated positions that may overlook the fight. |
| Smuggler | Rail yard with train cars, ladders, warehouses, and more open areas at the ends | Check whether enemies are using the train cars, their roofs, or the warehouses. Avoid exposing yourself to multiple approaches at once. |
A Reliable 2v2 Engagement Routine
- Check the immediate area. Identify the most obvious approach and the cover available to you.
- Share information. Tell your teammate where you saw an opponent instead of assuming they noticed the same thing.
- Avoid unnecessary separation. If one player is forced into a fight alone, the opposing pair may be able to isolate them.
- Reposition after contact. Once your location is known, consider changing angles instead of repeating the same peek.
- Adapt to the remaining players. If your team gains a numerical advantage, avoid giving it back through an unnecessary solo push.
Good communication does not require lengthy callouts. A clear enemy location and a quick description of the approach can be enough to help your teammate make a better decision.
5. Kill Block: Relearn the Layout Every Round
Kill Block is different from the fixed-layout maps. Set inside the Westbridge Training Facility, it uses modular sections that reconfigure between rounds. The official description states that the map supports more than 500 combinations and draws some inspiration from locations such as Crash, Highrise, and Shoot House.
This changes how you should approach map knowledge.
Do not rely on a memorized route from a previous configuration. At the start of each round, reassess the layout and identify the routes that are actually available.
Use this quick checklist:
- Locate the central combat area.
- Identify the nearest usable cover.
- Check which routes provide access to the opposing side.
- Look for sightlines that cross open ground.
- Reassess your plan after the configuration changes.
The goal is not to memorize hundreds of possible layouts. It is to develop the habit of reading the current layout quickly and making sensible decisions from the information available.
6. Adapt Your Routes to the Game Mode
The same route can be useful in one mode and wasteful in another. Always consider what your team needs to accomplish before choosing where to fight.
| Mode | Main Objective | Route and Positioning Advice |
| Team Deathmatch | Reach the elimination score limit | Move with awareness of teammates and avoid repeatedly entering the same watched lane. |
| Domination | Capture and defend objectives | Prioritize routes that help your team contest flags. Do not chase enemies so far that you abandon useful objective control. |
| Hardpoint | Capture and hold a rotating objective | Consider the next objective location and avoid leaving every teammate to defend the current point without support. |
| Search and Destroy | Complete or defend the round objective | Minimize unnecessary exposure, communicate enemy sightings, and coordinate pushes rather than entering a defended area one player at a time. |
| Kill Confirmed | Collect friendly tags and deny enemy tags | Consider the risk of approaching a dropped tag before crossing an exposed lane. Eliminations alone do not complete the objective. |
| Inflation | Collect CoD MW4 DMZ Cash while managing the risk of becoming a revealed high-value target | Reconsider your route as your cash total increases and balance aggressive collection against protecting your accumulated earnings. |
| Hijack | Carry, throw, or pass the Data Spike toward the enemy Comm Station and defend the upload | Coordinate movement around the objective. Once an upload begins, prioritize defending the area and preventing the enemy from aborting the transfer. |
| Ground War: Combat Outpost | Capture Outposts, establish spawn locations, and reinforce them | Coordinate with your squad around territory control rather than treating every engagement as an isolated elimination opportunity. |
Mode availability and rules can change with updates, so check the current in-game description when planning a specific strategy.
7. A 15-Minute Map Practice Plan
You do not need to study an entire map in one session. A short, structured routine can help you identify mistakes and build familiarity.
Minutes 1–5: Learn the Landmarks
Open the Tac-Map where available and identify major structures, objectives, and exposed areas. Choose two landmarks that will help you stay oriented during the match.
Minutes 6–10: Compare Routes
Identify the route you would normally take and look for another available approach. Compare their exposure, cover, and distance to the objective. Do not assume the alternate route is safer until you have checked it in-game.
Minutes 11–15: Review Your Decisions
After several engagements, ask yourself:
- Did I cross an exposed area without checking it?
- Did I approach an enemy from an angle they were already watching?
- Did I leave my teammate unsupported?
- Did my movement help the team contest the objective?
- Could I have repositioned instead of repeating a losing fight?
Choose one mistake to correct in your next match. Improving a specific decision is easier to measure than trying to change your entire playstyle at once.
Final Thoughts
The best Modern Warfare 4 multiplayer map guide is one you can apply during a real match. Learn the major landmarks, understand how routes connect, recognize dangerous lanes, and select positions based on the objective rather than appearance alone.
For Core 6v6, concentrate on local routes, entrances, and nearby threats. In Ground War, expand your awareness to terrain, vehicles, and squad movement. In Gunfight, prioritize information, teamwork, and controlled engagements. On Kill Block, reassess the layout every round instead of relying on fixed-map habits.
Most importantly, separate confirmed map information from tactical interpretation. Official descriptions and Tac-Maps establish the environment; your own match observations help determine which routes and positions are effective against the opponents you face. Combine both, and you will make more informed decisions, waste fewer lives on predictable pushes, and contribute more consistently to your team.